Safety Precautions
Always keep the remote control and vehicle away from water, fire, and heat sources. Ensure adult supervision and proper battery charging. Dispose of packaging before use.
1.1. General Safety Guidelines
Always ensure adult supervision when operating the 12V ride-on jeep. Keep the vehicle away from water, fire, and heat sources to prevent damage or hazards. Ensure the child understands basic safety rules, such as wearing appropriate clothing and avoiding rough terrain. Never overload the jeep beyond its recommended weight limit. Store the remote control and vehicle in a dry, cool place. Dispose of packaging materials safely before use. Follow all instructions in the user manual to ensure proper operation and maintenance. Regularly inspect the vehicle for loose parts or damage and address issues promptly.

1.2. Battery Safety Tips
Charge the 12V battery using only the provided charger to avoid damage. Ensure the battery is charged in a well-ventilated area, away from flammable materials. Never overcharge the battery, as this can cause overheating. Store the battery in a cool, dry place when not in use. Avoid exposing the battery to water or extreme temperatures. Always follow the charging instructions outlined in the user manual. If the battery shows signs of damage or swelling, discontinue use immediately and replace it. Keep charging out of children’s reach to prevent accidents.
1.3. Remote Control Safety
Keep the remote control dry and away from heat sources or flammable materials. Ensure batteries are inserted with correct polarity and avoid using damaged batteries. Do not expose the remote to water or extreme temperatures. Store the remote in a secure, dry place when not in use. Supervise children during operation to prevent accidental misuse. If the remote malfunctions, stop the vehicle immediately and disconnect the battery. Always follow pairing instructions carefully to ensure proper functionality. Regularly inspect the remote for damage and replace it if necessary to maintain safe operation.
Assembly Instructions
Unpacking and inventory are essential first steps. Follow the step-by-step assembly guide carefully. Attach all accessories securely. Adult assembly is recommended for safety and accuracy.
2.1. Unpacking and Inventory
Begin by carefully unpacking the ride-on jeep and remote control. Ensure all components, including the vehicle, remote, battery, charger, and accessories, are included. Check for any damage or missing parts. Review the inventory list provided in the manual to confirm everything is accounted for. Organize the parts and tools before starting assembly. This step ensures a smooth and efficient assembly process. Always follow the manufacturer’s instructions and guidelines for unpacking and inventory to avoid any issues later.

2.2; Step-by-Step Assembly Process
Start by assembling the base of the jeep, attaching the wheels securely using the provided screws. Next, install the seat and steering wheel, ensuring they are tightly fastened. Attach the remote control receiver to the vehicle’s chassis, following the manual’s wiring diagram. Connect the battery to the power system, making sure all terminals are secure. Finally, mount any additional accessories like lights or a spare wheel. Double-check all connections and tighten any loose parts before proceeding. Refer to the instruction manual for detailed diagrams and specific assembly instructions to ensure everything is correctly installed.
2.3. Attaching Accessories
Begin by attaching the spare wheel to the designated clip on the rear of the jeep. Securely fasten any additional accessories like lights or a roof using the provided screws. Ensure all components are tightly fitted to avoid loose parts during operation. Refer to the manual for specific instructions on accessory installation. After attaching, double-check all connections to ensure stability and safety. Properly securing accessories prevents potential hazards and enhances the overall functionality of the ride-on jeep. Always follow the manufacturer’s guidelines for accessory installation to maintain the product’s integrity.

Operating the Ride-On Jeep
Switch modes using the FOOT-R/C SWITCH. Press the P key for emergency braking when in remote control mode. Ensure smooth transitions between manual and remote operation.

3.1; Manual Operation Mode
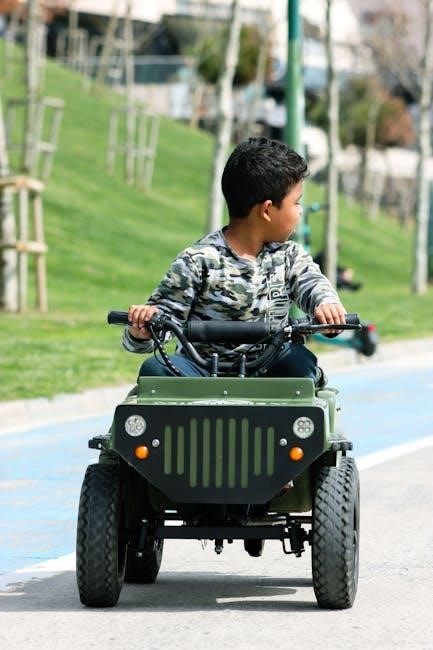
In manual mode, your child can operate the 12V ride-on jeep independently using the foot pedal and steering wheel. Ensure the FOOT-R/C SWITCH is set to manual. Press the pedal gently for smooth acceleration and release to brake. Teach your child to avoid sudden stops and sharp turns. Always supervise younger kids to ensure safe operation. For novice drivers, start in a wide, open space free of obstacles. This mode is ideal for developing coordination and driving skills before transitioning to remote control. Regularly check the vehicle’s condition to maintain performance and safety.
3.2. Remote Control Operation
The remote control allows parents to guide the 12V ride-on jeep safely. Press the FOOT-R/C SWITCH to enable remote mode. Use the directional joysticks to control movement and speed. Ensure the remote is paired correctly by following the pairing instructions in the manual. Maintain a clear line of sight and keep the remote away from children. Use this mode for younger kids or to assist in difficult maneuvers. Always supervise during remote operation and ensure the vehicle is on a flat, stable surface before switching control modes. This feature enhances safety and provides peace of mind for parents.
3.3. Switching Between Modes
To switch between Manual and Remote Control modes, locate the FOOT-R/C SWITCH on the vehicle. Slide it to the desired mode. In Remote Control mode, press the ON-OFF SWITCH on the remote to activate. For Manual mode, ensure the remote is turned off. The vehicle will default to manual operation, allowing the child to drive using the foot pedal and steering wheel. Always ensure the vehicle is stationary before switching modes to prevent accidental movement. This feature provides flexibility for different driving preferences and ensures smooth transitions between control methods. Proper mode switching enhances safety and user experience.

Technical Specifications
The 12V ride-on jeep features a 12V 7AH battery, 12V 2x35W motor, and a 2.4GHz remote control. Maximum speed is 5 km/h, with a weight limit of 30 kg for safe operation.
The vehicle includes realistic lights and durable construction, ensuring a long-lasting and enjoyable experience for children.

4.1. Battery and Motor Details
The 12V ride-on jeep is powered by a 12V 7AH rechargeable battery, ensuring extended playtime. The motor operates at 12V, providing smooth and efficient performance. Always use the provided 12V charger to avoid damage. Charging time is approximately 18 hours for the first use and 8-12 hours thereafter. The vehicle features a 15A fuse for added safety. The motor delivers a maximum speed of 5 km/h, making it suitable for children while ensuring safe operation. Proper battery maintenance is crucial for longevity and optimal performance.
4.2. Remote Control Features
The 2.4G remote control offers reliable signal strength and interference-free operation. It allows parents to control speed and direction, ensuring safe use. The remote operates on non-rechargeable batteries with correct polarity. Features include an emergency brake function by pressing the P key, instantly stopping the vehicle. To pair, switch the vehicle to remote mode and turn on the remote. Follow the pairing instructions in the manual for seamless connection. Always store the remote out of children’s reach when not in use to prevent accidental operation.
4.3. Weight and Age Limits
The 12V ride-on jeep is designed for children aged 3–8 years, with a maximum weight capacity of 120 lbs. Ensure the child meets these limits for safety and optimal performance. Adult assembly is required, and supervision is recommended during operation. Proper weight adherence prevents motor strain and ensures longevity of the vehicle. Always follow the manufacturer’s guidelines to guarantee safe and enjoyable use for your child.
Maintenance and Care
Regularly clean the vehicle to prevent dirt buildup. Check and maintain the battery, tires, and electrical components. Avoid harsh chemicals and follow manual guidelines for inspections.
5.1. Cleaning the Vehicle
Regular cleaning is essential for maintaining the 12V ride-on jeep. Use a soft cloth and mild soap solution to wipe down the exterior and interior. Avoid harsh chemicals or abrasive materials that could damage the paint or surfaces. For tough stains, gently scrub with a damp cloth. Ensure the wheels and suspension are free from dirt and debris to maintain smooth operation. Avoid submerging any parts in water or using high-pressure washes. After cleaning, dry the vehicle thoroughly to prevent rust or mold. Regular cleaning helps preserve the vehicle’s appearance and functionality for long-term use. Always store in a dry, cool place.
5.2. Battery Maintenance
Proper battery maintenance is crucial for extending the life of your 12V ride-on jeep. Always use the provided charger or a compatible 12V charger to avoid damage. Charge the battery in a well-ventilated area, away from flammable materials. Ensure the battery is fully charged before first use, typically requiring 18 hours. Avoid overcharging, as it can reduce battery performance. Store the battery in a cool, dry place when not in use. Regularly inspect the battery terminals for corrosion and clean them with a soft brush if necessary. Never charge non-rechargeable batteries, and keep them out of reach of children. Proper care ensures safe and reliable operation.
5.3. Checking and Replacing Parts
Regularly inspect the ride-on jeep for worn or damaged parts. Check tires, brakes, and suspension for wear. Inspect electrical components like wires and connections for damage. Replace any faulty parts promptly to ensure safety and performance; Use genuine or compatible replacements to maintain functionality. Refer to the user manual for specific part numbers and torque specifications. Always turn off the power before performing any maintenance. If unsure, consult a professional or contact the manufacturer for assistance. Proper part replacement ensures longevity and reliable operation of the vehicle.

Troubleshooting Common Issues
Check battery connections and charge levels for power issues. Ensure remote control pairing is correct. Inspect wires and motors for damage. Refer to manual for detailed solutions.
6.1. Remote Control Pairing Issues
If the remote control isn’t responding, ensure it’s properly paired with the vehicle. Press the pairing button on the vehicle and the remote simultaneously for 3-5 seconds. Verify the vehicle is in remote control mode by checking the mode switch. Ensure batteries are correctly inserted with proper polarity. If issues persist, reset the system by turning the vehicle off, waiting 10 seconds, and restarting. Consult the user manual for specific pairing instructions. If problems remain, contact customer support for further assistance. Always follow the manufacturer’s guidelines for troubleshooting.

6.2. Battery Charging Problems
If the battery fails to charge, ensure the charger is correctly connected to both the battery and a working power outlet. Verify the charger is specifically designed for a 12V battery. Check for any blockages or damage to the charging port. Allow the battery to charge for the recommended 18 hours before first use. Ensure the charger’s polarity matches the battery terminals. If issues persist, check the fuse or consult the user manual. Avoid using non-rechargeable batteries. If problems remain unresolved, contact the manufacturer or customer support for assistance. Always follow the provided charging instructions carefully.
6.3. Motor Malfunction Solutions
If the motor stops working, ensure the battery is fully charged and properly connected; Check for loose wires or faulty connections. Verify the remote control is paired correctly and functioning. Reduce the vehicle’s speed if it’s moving erratically. Ensure the foot switch is set to the correct mode (manual or remote). If issues persist, consult the user manual or contact customer support; Avoid overloading the vehicle beyond its weight limit. Regular maintenance, such as cleaning and lubricating moving parts, can prevent motor malfunctions. Always follow the manufacturer’s troubleshooting guidelines for optimal performance.