
Safety Precautions and Important Warnings
Always read the manual carefully before using your Jensen RV TV. Avoid installing on unstable surfaces and ensure proper grounding to prevent electric shock. Clean with a dry cloth only‚ and never perform unauthorized servicing unless qualified. Keep the manual for future reference and follow all warnings strictly.
- Unplug the TV before cleaning to avoid electric shock.
- Do not install on surfaces smaller than the TV’s support area.
- Follow all safety guidelines to ensure safe operation.
1.1 Essential Safety Guidelines

Read the manual thoroughly before operating your Jensen RV TV. Ensure stable installation and proper grounding to prevent electric shock. Clean only with a dry cloth‚ avoiding liquids. Never exceed weight limits or perform unauthorized repairs. Follow all safety warnings to ensure safe and optimal TV performance.
- Avoid unstable surfaces for installation.
- Keep the TV away from water and moisture.
- Do not modify the TV or its components.
1.2 Installation Warnings and Precautions
Ensure the installation surface is stable and large enough to support the TV. For RV use‚ connect the red wire to the 12V accessory line and the black wire to ground. Avoid installing near water or in humid environments. Follow the VESA mounting pattern guidelines and refer to the stand manual for details.
- Use a secure and level surface for installation.
- Avoid exposure to moisture or extreme temperatures.
- Consult the manual for specific mounting instructions.
Initial Setup and Connections
Connect the antenna or cable wire to the TV. Plug in the power cord and turn on the TV. The quick setup wizard will guide you through channel tuning and basic settings.
- Ensure all cables are securely connected.
- Follow on-screen instructions for setup.
2.1 Connecting the TV to Power and Antenna
Connect the TV to a power source using the provided AC/DC adapter. Attach the antenna or cable wire to the RF input. Turn on the TV and follow the on-screen quick setup wizard to scan for channels. For DC installations‚ connect the red wire to the 12V accessory line and the black wire to ground.
- Ensure the antenna is securely connected for optimal reception.
- Plug the power cord into a compatible outlet or DC connector;
- Use the wizard to complete channel tuning and basic setup.
2.2 Understanding Input/Output Ports and Cables
Familiarize yourself with the TV’s ports: HDMI for HD signals‚ USB for media playback‚ VGA for PC connections‚ and AV for legacy devices. Use high-quality cables to ensure optimal performance. Refer to the manual for specific port locations and compatibility with external devices like DVD players or gaming consoles.
- HDMI supports high-definition video and audio transmission.
- USB ports allow playback of media files from external drives.
- VGA connections are ideal for linking to computers or older devices.
2.3 Running the Quick Setup Wizard
Connect the antenna or cable‚ then power on the TV. The quick setup wizard will appear‚ guiding you to select antenna type and scan for channels. Follow on-screen instructions to configure settings like language‚ time zone‚ and channel lineup. Save your preferences to complete the setup and enjoy optimal viewing.
- Ensure the antenna is properly connected before starting.
- Use the remote to navigate through the wizard’s menu.
- Save your settings to finalize the configuration.

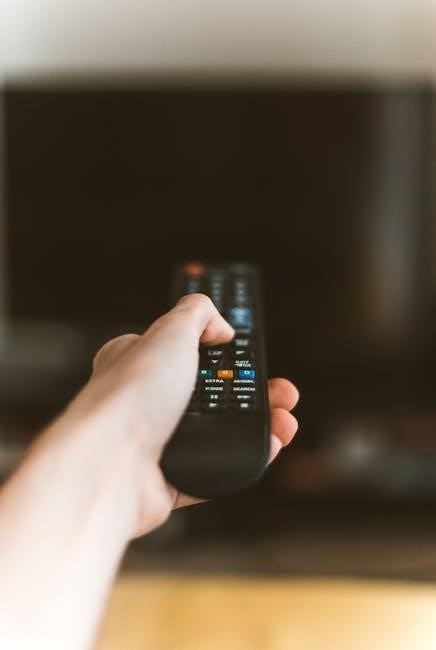
Remote Control Functionality
The Jensen RV TV remote controls both the TV and DVD player. No need to aim it at the DVD player. Use POWER‚ CH‚ VOL‚ RETURN‚ and MUTE buttons for easy navigation.
- Controls DVD functions via the TV’s IR receiver.
- Press POWER to turn the TV on/off.
- Use CH and VOL buttons for channel and volume control.
3.1 Navigating the On-Screen Menu
Press the MENU button on the remote to access the main menu. Use the UP and DOWN arrows to navigate through options. Select desired settings with the ENTER button. The on-screen display may vary slightly from actual operations‚ as noted in the manual.
- Press MENU to open the main menu.
- Navigate using UP and DOWN arrows.
- Select options with the ENTER button.
3.2 Using the Remote Control Buttons
The remote control features essential buttons like POWER‚ CH‚ VOL‚ RETURN‚ and MUTE. Use the MENU button to access settings. Press ENTER to select options and navigate through menus. The remote can also control DVD functions when paired with compatible Jensen devices.
- Power button turns the TV on/off.
- CH and VOL buttons adjust channels and volume.
- RETURN and MENU buttons navigate settings.
3.4 Pairing the Remote Control with the TV
The remote control is pre-paired with the TV for seamless operation. Ensure line of sight between the remote and TV’s IR sensor. For DVD player control‚ ensure the remote is configured to communicate with the connected Jensen device through the TV’s IR receiver.
- Line of sight is essential for proper remote function.
- No additional pairing is required for basic TV functions.
- Remote can control DVD functions when properly configured.
- HD and Full HD display options available.
- jCOM protocol ensures seamless HDMI communication.
- VESA mounting pattern for secure installation.
- No signal: Verify antenna connection and channel tuning.
- Poor picture: Adjust settings or check cable quality.
- Remote issues: Replace batteries or re-pair the remote.
- Check antenna connection and alignment.
- Verify cable connections and ensure they are secure.
- Restart the TV and re-run the quick setup wizard.
- Ensure batteries are fresh and properly inserted.
- Check for obstructions blocking the IR sensor.
- Pair the remote control with the TV if required.
- Press and hold the POWER button for 10 seconds.
- Navigate to the MENU and select SYSTEM.
- Choose RESET and confirm to restore default settings.
- Clean with a soft‚ dry cloth to prevent dust buildup.
- Use a microfiber cloth for the screen to avoid scratches.
- Avoid harsh chemicals or abrasive cleaners.
- Use a dry‚ soft cloth for the exterior.
- Microfiber cloth recommended for the screen.
- Avoid harsh chemicals and excessive moisture.
- Connect to Wi-Fi or use a USB drive for updates.
- Go to the menu and select “Software Update.”
- Follow on-screen instructions carefully.
- Warranty coverage varies by model and components.
- Register your TV for extended support benefits.
- Check the manual or website for specific terms.
- Phone: 1-800-354-2111
- Email: support@asaelectronics.com
- Website: Contact Us
- Website: Manuals & Guides
- Check device compatibility before installation.
- Use jCOM protocol for HDMI communication.
- Ensure CEC function for enhanced control.
- Consult the manual for repair guidelines.
- Use only genuine Jensen replacement parts.
- Contact authorized service centers for complex repairs.
- Download firmware from Jensen’s support site.
- Use a USB drive for update installation.
- Avoid powering off during the update process.
- Download PDF manuals for detailed instructions.
- Visit Jensen’s support page for troubleshooting.
- Explore recommended accessories for enhanced use.
- Access model-specific guides for optimal setup.
- Refer to troubleshooting sections for common issues.
- Download from Jensen’s official support page for authenticity.
- Explore detailed product pages for specific models.
- Find direct links to download firmware and manuals.
- VESA-compatible wall mounts for stable installation.
- HDMI cables for reliable connectivity.
- Ensure proper installation and handling for durability.
- Position the TV for minimal glare and best visibility.
- Connect external devices via HDMI for high-quality output.
- Adjust brightness and contrast for ideal picture quality.
Specifications and Features of Jensen RV TVs
Jensen RV TVs offer HD and Full HD displays‚ jCOM protocol for HDMI communication‚ and VESA mounting patterns for easy installation. They are lightweight‚ durable‚ and designed for RV use.
4.1 HD and Full HD Display Capabilities
Jensen RV TVs feature HD and Full HD displays‚ offering crisp visuals with 1920×1080 resolution and 16.7 million colors. High-performance LCD panels ensure vibrant imagery‚ while wide viewing angles enhance the RV entertainment experience. Designed for mobility‚ these displays combine clarity and durability for optimal performance in varying lighting conditions.
4.2 jCOM Protocol for HDMI Communication
The jCOM protocol enables seamless HDMI communication between Jensen RV TVs and compatible devices like DVD players. This feature supports CEC functionality‚ allowing synchronized control of connected devices via a single remote. It enhances ease of use and ensures a unified entertainment experience in your RV setup.
4.3 VESA Mounting Pattern and Weight Considerations
Jensen RV TVs feature a VESA 200mm x 200mm mounting pattern for secure installation. Ensure the mounting surface supports the TV’s weight‚ as specified in the manual. Proper weight distribution is crucial for stability‚ especially in RV environments. Always follow installation guidelines to prevent damage or safety hazards.
Troubleshooting Common Issues
Common issues include no signal‚ poor picture quality‚ or remote control malfunctions. Reset the TV‚ check connections‚ and ensure proper antenna alignment for optimal performance.
5.1 No Signal or Poor Picture Quality
If experiencing no signal or poor picture quality‚ ensure the antenna is properly connected and aligned. Check for loose cables and verify channel tuning. Adjust picture settings or reset the TV to factory defaults. Ensure software is updated and consult the manual for additional troubleshooting steps.
5.2 Remote Control Not Responding
If the remote control is not responding‚ check the batteries and ensure they are installed correctly. Aim the remote directly at the TV’s IR sensor and eliminate obstructions. Pair the remote control with the TV if necessary. Reset the TV to factory settings as a last resort. Consult the manual for pairing instructions.
5.3 Resetting the TV to Factory Settings
To reset your Jensen RV TV to factory settings‚ press and hold the POWER button for 10 seconds. Navigate to the MENU‚ select SYSTEM‚ and choose RESET. Confirm the reset to restore default settings. This will erase all custom settings‚ returning the TV to its original configuration. Refer to the manual for detailed steps.
Maintenance and Care Tips
Regularly clean the TV with a soft‚ dry cloth to avoid dust buildup. Use a microfiber cloth for the screen to prevent scratches. Avoid harsh chemicals or abrasive cleaners‚ as they may damage the display or exterior finish. Proper storage and transportation are crucial to maintain the TV’s condition.
6.1 Cleaning the TV Screen and Exterior
Turn off the TV and unplug it before cleaning. Use a dry‚ soft cloth to wipe the exterior and a microfiber cloth for the screen to prevent scratches. Avoid harsh chemicals‚ abrasive cleaners‚ or excessive moisture‚ as they can damage the display or finish. Always clean gently and dry thoroughly to prevent damage.
6.2 Updating TV Software
Regular software updates ensure optimal performance and new features. Connect your TV to the internet or use a USB drive for updates. Power on the TV‚ go to the menu‚ and select “Software Update.” Follow on-screen instructions to download and install the latest version. Always follow manufacturer guidelines to avoid issues.
6.3 Proper Storage and Transportation
Store your Jensen RV TV in a cool‚ dry place away from sunlight‚ extreme temperatures‚ and moisture. Ensure it’s clean‚ dry‚ and updated. Use a protective cover and secure it during transport‚ ideally in original packaging‚ handling
Warranty and Customer Support
Jensen RV TVs come with comprehensive warranty coverage. Visit their official website for detailed warranty terms‚ downloadable manuals‚ and contact information for dedicated customer support assistance.
7.1 Understanding the Warranty Terms
Review the warranty terms for your Jensen RV TV to ensure coverage understanding. Warranty periods vary by model‚ typically covering manufacturing defects. Register your product for extended benefits and faster support access. Refer to the official manual or manufacturer’s website for detailed terms and conditions.
7.2 Contacting Jensen Customer Service
For assistance‚ contact Jensen Customer Service via phone‚ email‚ or their official website. Visit support page for detailed contact information. Ensure to have your TV model number ready for efficient support. Representatives are available to address queries‚ warranty claims‚ and technical issues during business hours.
7.3 Online Resources and Manuals
Access Jensen RV TV manuals and resources online. Download PDF guides for models like JE3214 and JE4020. Visit the support page for troubleshooting‚ user guides‚ and firmware updates. Ensure you have the correct model number for accurate information and support.

Frequently Asked Questions (FAQs)
Find answers to common questions about Jensen RV TV compatibility‚ troubleshooting‚ and firmware upgrades; Additional details are available in the downloadable manual.
8.1 Compatibility with Other Jensen Devices
Ensure seamless integration of your Jensen RV TV with other Jensen devices. The jCOM protocol enables direct HDMI communication with Jensen stereos and DVD players. The CEC function allows advanced control‚ while the dual-function remote simplifies operation. Verify compatibility with specific models like Jensen JE4020 for optimal performance and integrated features.
8.2 Replacing or Repairing TV Components
For replacing or repairing Jensen RV TV components‚ consult the user manual or contact Jensen customer support. Ensure all repairs are done by authorized personnel or follow manual instructions. Use genuine Jensen parts to maintain warranty validity and performance. Refer to troubleshooting guides for common issues before seeking professional help.
8.3 Upgrading TV Firmware
Regular firmware updates enhance performance and add features. Download the latest firmware from Jensen’s official website using a USB drive. Connect the USB to the TV‚ navigate to the settings menu‚ and follow on-screen instructions to complete the update. Ensure the TV is powered on and do not interrupt the update process.

Additional Resources for Jensen RV TVs
Access downloadable PDF manuals‚ links to manufacturer support pages‚ and recommended accessories for optimal functionality and maintenance of your Jensen RV TV.
9.1 Downloadable PDF Manuals
Download official Jensen RV TV manuals in PDF format from authorized sources. Manuals include detailed setup guides‚ troubleshooting tips‚ and specifications for models like JE3215‚ JE4020‚ and JTV2815DC. Ensure authenticity by downloading from Jensen’s official website or trusted retailers to avoid unauthorized content.
9.2 Links to Manufacturer Support Pages
Visit Jensen’s official support page for comprehensive resources‚ including troubleshooting guides‚ firmware updates‚ and user manuals. Access model-specific support for TVs like JE3215‚ JE4020‚ and JTV2815DC. Ensure authenticity by using the official Jensen Electronics support website for reliable assistance.
9.3 Recommended Accessories
Enhance your Jensen RV TV experience with compatible accessories. Consider a VESA 200mm x 200mm wall mount for secure installation. Pair with HDMI-equipped Jensen DVD players for seamless jCOM protocol connectivity. Additionally‚ invest in a high-quality antenna for optimal signal reception and a surge protector to safeguard your TV from power fluctuations.
Maximize your Jensen RV TV experience by following setup guides and maintenance tips. Regularly update software and clean the screen for optimal performance. Refer to the manual for troubleshooting and stay updated on new features for enhanced viewing pleasure.
10.2 Staying Updated with Jensen RV TV Features
10.1 Maximizing Your Viewing Experience
Enhance your entertainment with Jensen RV TV’s HD and Full HD capabilities. Utilize the jCOM protocol for seamless HDMI communication with Jensen DVD players. Ensure proper VESA mounting for optimal viewing angles. Adjust picture settings for clarity and brightness‚ and explore USB connectivity for external media. Regular updates ensure peak performance.